
Paying with your phone can feel strange the first time you try it. You might wonder whether you’ve set it up correctly, where to hold your phone, or whether someone could accidentally take a payment.
Fortunately, once everything is set up, paying with your phone can be very simple.
If you have an iPhone, you’ll normally use Apple Pay through the Wallet app.
If you have an Android phone, you’ll normally use Google Wallet. You may also see the name Google Pay, particularly when paying online or in apps.
This beginner’s guide explains everything you need to know to make your first payment with your phone, from adding your bank card to actually holding your phone against the card reader.
Quick answer: You don’t normally transfer money into Apple Pay or Google Wallet. You add an eligible debit or credit card you already have. When you pay with your phone, the payment is charged to that card.
What are Apple Pay and Google Pay?
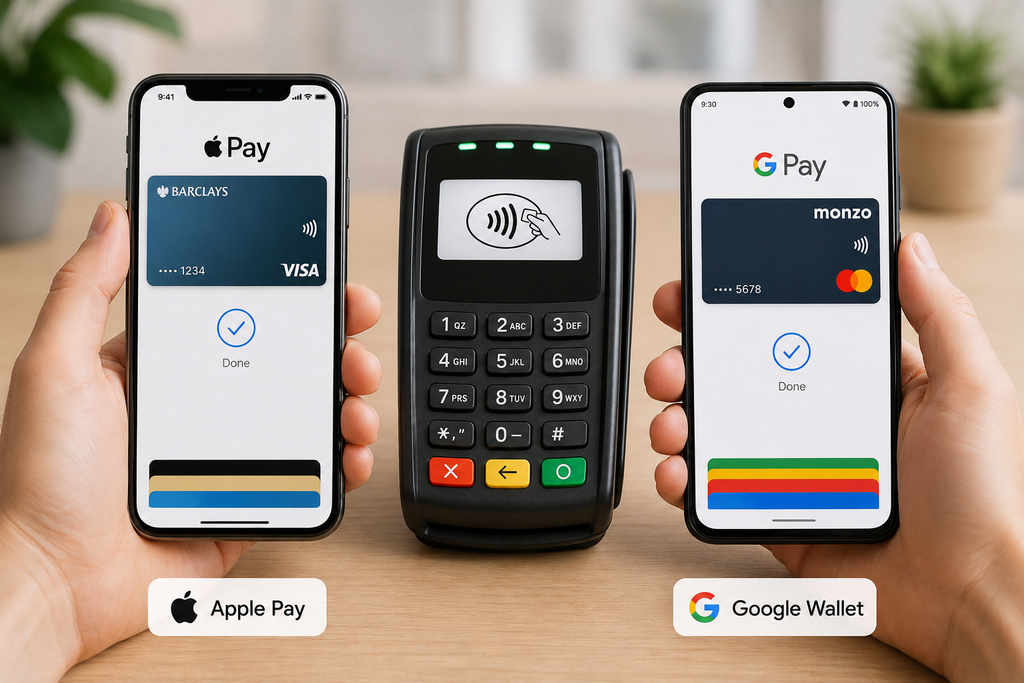
Apple Pay and Google Wallet allow you to use a compatible phone instead of taking your physical bank card out of your wallet.
Once you’ve added a supported debit or credit card, you can use your phone at many of the same contactless payment terminals where you would normally tap your bank card.
You can also use Apple Pay or Google Pay on supported websites and in apps.
You still have a normal bank account and bank card. Your phone simply becomes another secure way of using that card.
What do I need before I start?
For Apple Pay, you’ll need a compatible Apple device, a supported card, an Apple Account and a security method such as Face ID, Touch ID or a passcode. Apple also recommends keeping your device software up to date.
For Google Wallet contactless payments, you’ll need a compatible Android phone with NFC, a supported payment card and a screen lock. Google Wallet must also be correctly configured for contactless payments.
Don’t worry if you’ve never heard of NFC.
NFC (Near Field Communication) is simply the technology that allows your phone and the payment terminal to communicate when they’re held close together.
How to Set Up Apple Pay on an iPhone
First, find and open the Wallet app on your iPhone.
Then:
- Tap the + (Add) button.
- Choose Debit or Credit Card.
- Tap Continue.
- Follow the instructions to add your card.
- Check that the card details are correct.
- Complete any verification requested by your bank.
Depending on your iPhone and card, you may be able to add the card automatically or enter the details manually.
Your bank may ask you to complete an additional security check before approving the card for Apple Pay.
Is adding my bank card to my iPhone safe?
Adding a card to Apple Wallet does not mean that anyone holding your phone can automatically spend money from your bank account.
Apple Pay uses the security features on your device. Normal purchases require authentication using a method such as Face ID, Touch ID or your device passcode.
Never tell another person your phone passcode or a bank verification code because they claim they need it to help you set up Apple Pay.
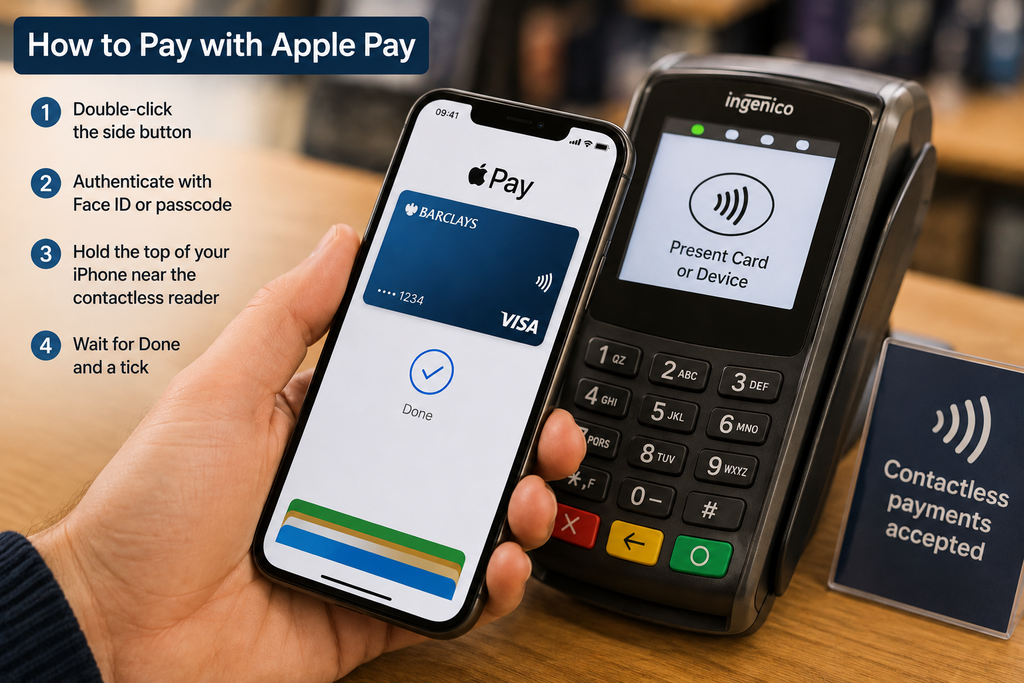
How to Make Your First Apple Pay Payment
Look for the contactless payment symbol on the shop’s card machine.
If your iPhone uses Face ID:
- Double-click the side button.
- Look at your iPhone to authenticate with Face ID, or enter your passcode if requested.
- Hold the top of your iPhone close to the contactless reader.
- Wait until Done and a tick appear.
Apple also provides instructions for iPhones using Touch ID.
Do I need to open my banking app?
No.
You don’t normally need to open your Barclays, NatWest, Lloyds or other banking app every time you buy something.
Once Apple Pay has been properly set up, you make the payment using Apple Wallet.
How to Set Up Google Pay / Google Wallet on Android
On an Android phone, look for the Google Wallet app.
If it isn’t installed, Google Wallet is available through the Google Play Store on compatible Android devices.
Open Google Wallet and:
- Tap Add to Wallet.
- Choose Payment card.
- Choose New credit or debit card.
- Scan your card or enter its details manually.
- Tap Save and continue.
- Read and accept your card issuer’s terms.
- Complete any verification requested by your bank.
Some banks also allow you to add a card to Google Wallet from their banking app.
What is NFC and do I need to turn it on?
For contactless payments with an Android phone, NFC needs to be available and enabled.
NFC allows your phone to communicate with a contactless payment terminal over a very short distance.
If you’re unsure whether it’s enabled, open your phone’s Settings and search for:
NFC
Google also requires appropriate device security, such as a screen lock, for contactless payments. Exact settings and menu names can differ between Android phones.
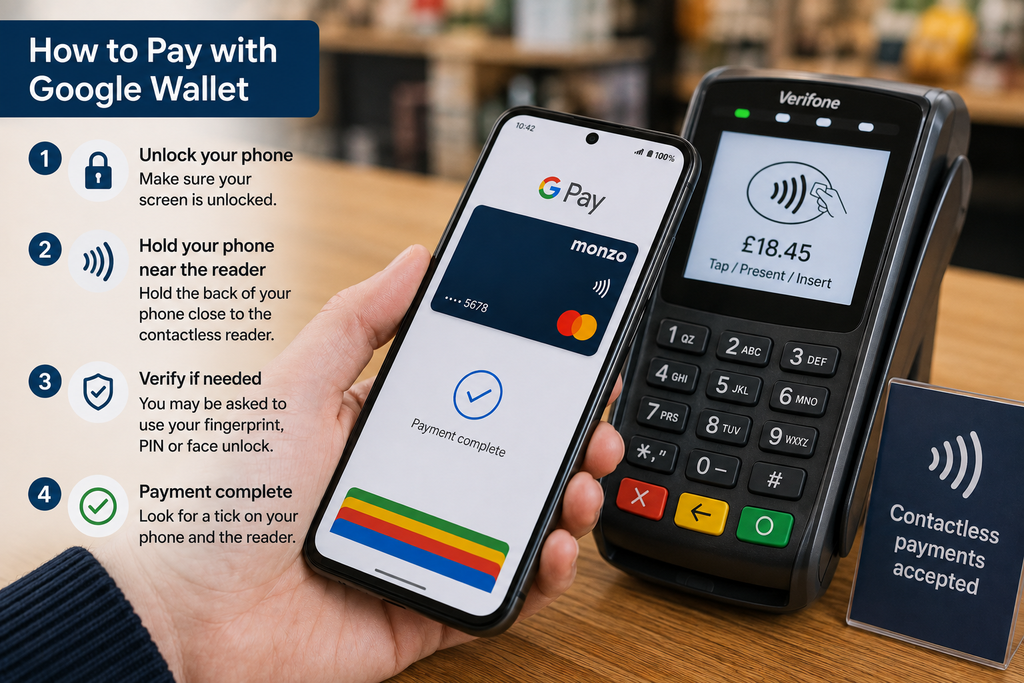
How to Make Your First Google Wallet Payment
Once Google Wallet is correctly set up:
- Unlock your Android phone.
- Hold your phone close to the contactless reader.
- Complete any verification requested on the phone.
- Wait for confirmation that the payment has been successful.
You don’t normally need to open the Google Wallet app before making a standard contactless payment.
If nothing happens, try moving the phone slightly around the reader. The NFC antenna can be positioned differently depending on the phone model.
Where Can I Pay With My Phone?
Look for the familiar contactless payment symbol on the card reader.
Apple Pay can be used at many shops, restaurants and other businesses that accept compatible contactless payments.
Google Wallet can similarly be used at supported contactless payment terminals.
You may also see Apple Pay or Google Pay offered as a payment option when shopping online or using an app.
Does Paying With My Phone Cost Extra?
Apple Pay and Google Wallet aren’t separate bank accounts that you normally have to fill with money before making an ordinary card payment.
The transaction uses the debit or credit card you’ve added to your wallet.
However, the normal fees and conditions attached to your bank account or credit card can still apply — for example, foreign transaction fees or credit-card interest.
Can I Still Use My Normal Bank Card?
Yes.
Adding your card to your phone does not stop your physical debit or credit card from working.
You can continue carrying and using it normally.
Simple Tech Guide tip
When trying mobile payments for the first time, take your physical bank card with you as a backup.
That removes much of the worry about trying something unfamiliar at the checkout.
Is Apple Pay or Google Pay Safe?
Both mobile-payment systems include important security protections.
Apple Pay uses authentication such as Face ID, Touch ID or your passcode for normal iPhone payments.
Google Wallet also requires appropriate device security for contactless payments.
You should still follow some basic security rules:
- Protect your phone with a strong passcode or screen lock.
- Use fingerprint or facial recognition where appropriate.
- Keep your phone software updated.
- Never give someone a verification code sent by your bank.
- Don’t add a card because an unexpected caller tells you to.
- Check unfamiliar transactions with your bank.
⚠️ Important: Be extremely suspicious if somebody unexpectedly contacts you and asks you to transfer money to a “safe account”, reveal a security code or make a payment to protect your money.
What Happens if I Lose My Phone?
Losing your phone doesn’t automatically mean somebody can start spending with your bank cards.
Your phone and mobile wallet have security protections.
However, you should deal with a lost or stolen phone promptly.
Use Apple’s or Google’s device-location and security services where appropriate and contact your bank if you believe your cards or accounts could be at risk.
Your bank can advise you about suspending or replacing a card if necessary.
Why Can’t I Add My Bank Card?
Don’t immediately assume there’s something wrong with your phone.
Some common causes include:
Your card isn’t supported
Not every card works with every mobile wallet. Check with your bank or card provider.
Your bank needs to verify the card
You may need to approve the card through your banking app, text message or another legitimate verification method.
Your phone isn’t properly secured
Make sure you have an appropriate passcode or screen lock.
NFC isn’t enabled on Android
Search your Android phone’s Settings for NFC and check that contactless functionality is available and enabled.
Can I Have More Than One Card on My Phone?
Yes.
You can add multiple eligible cards to Apple Wallet or Google Wallet.
You can then have a default payment card while choosing another card when you want to use it.
This can be useful if, for example, you have one card for everyday spending and another for a separate account.
Can I Use Apple Pay or Google Wallet on a Smartwatch?
Yes, on compatible watches.
Apple Pay works with compatible Apple Watches, while Google Wallet supports contactless payments on compatible Wear OS watches in supported countries and circumstances.
If you’re completely new to mobile payments, however, I recommend learning to make a payment using your phone first.
Once you’re comfortable with that, using a smartwatch becomes much easier.
Apple Pay vs Google Pay: Which One Do I Need?
For most beginners, the answer is straightforward:
🍎 Have an iPhone?
Start with Apple Pay / Apple Wallet.
🤖 Have an Android phone?
Start with Google Wallet.
You don’t need to become an expert in either system.
The basic idea is the same:
Your bank card → stored securely in your phone’s wallet → phone used at a contactless card reader.
Your First Phone Payment: Simple Checklist
Before leaving home:
✓ Add your debit or credit card
✓ Complete your bank’s verification
✓ Make sure your phone has a passcode or screen lock
✓ Android users: check NFC
✓ Take your physical bank card as a backup
Then try using your phone for a small everyday purchase.
Once you’ve successfully done it once or twice, the process should feel much more familiar.
Frequently Asked Questions
Do I need a special bank account for Apple Pay or Google Pay?
No. You need an eligible debit or credit card from a bank or card issuer that supports the relevant service.
Can I accidentally pay just by walking past a card reader?
Mobile wallets use device and payment security controls. Simply carrying a phone near a shop terminal isn’t the normal authenticated payment process.
Do I have to open Google Wallet every time I pay?
Normally, no. Once everything is correctly configured, Google says you can unlock your phone and hold it near the reader.
How do I know whether a shop accepts phone payments?
Look for the contactless payment symbol on or around the card reader.
What if my phone payment is declined?
Try your physical card. If your card works but your phone repeatedly doesn’t, check the wallet setup and contact your bank if necessary.
Can I remove my bank card from my phone later?
Yes. You can remove cards from your mobile wallet if you no longer want to use them there.
You Don’t Need to Learn Everything at Once
If you’ve never paid with a phone before, Apple Pay and Google Wallet can sound much more complicated than they actually are.
For your first attempt, remember just three things:
Add your card → secure your phone → try one small payment.
You can learn the additional features later.
And if you don’t feel comfortable using mobile payments, there is nothing wrong with continuing to use your physical bank card.
The purpose of technology is to make everyday tasks easier — not to make you feel pressured into using something you don’t want.
Official Help & Further Reading
If you need more help setting up mobile payments, these official guides have the latest instructions:
- Apple — Set up Apple Pay
- Apple — How to use Apple Pay in shops
- Google — Add a debit or credit card to Google Wallet
- Google — Pay contactless with your phone
You may also find these guides useful: